
Share:
Best Ship Detail Upgrade Sets for Scale Models (08.09.26)
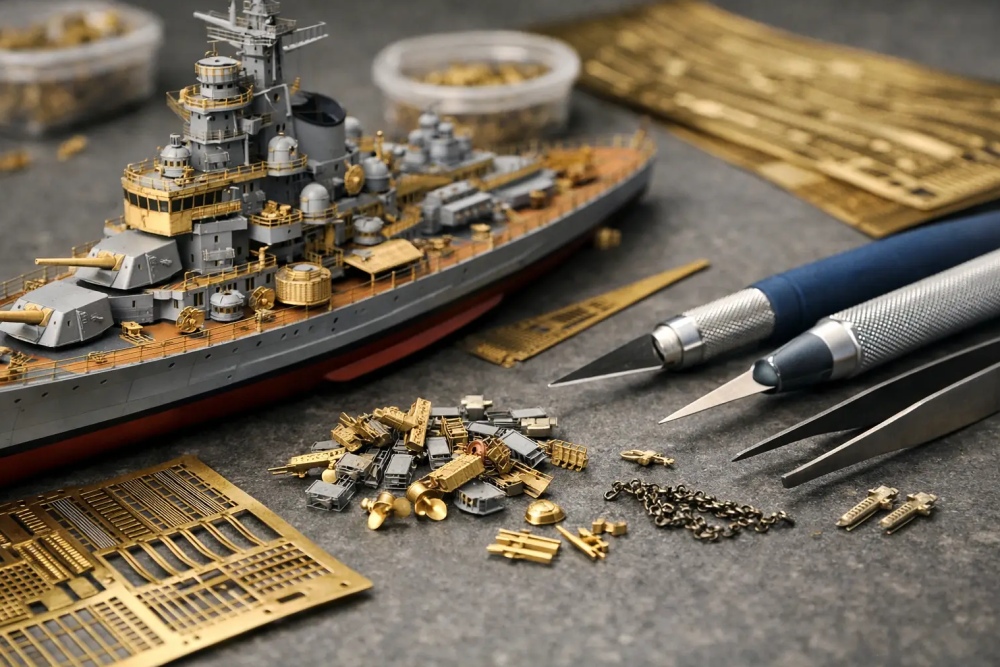
A ship kit can have a finely molded hull, accurate dimensions, and good surface detail, yet still look simplified once the deck fittings and railings are in place. That is where the best ship detail upgrade sets earn their place. A carefully chosen aftermarket set can replace heavy plastic parts with scale-thin components, correct visible omissions, and give a finished warship the busy, purposeful appearance seen in period photographs.
The key word is carefully. More detail is not automatically better detail, and the largest set is not always the right purchase. The best results come from matching the upgrade to the exact kit, scale, ship class, and stage of your build.
What Makes the Best Ship Detail Upgrade Sets Worth Buying?
A good upgrade set solves a visible problem in a specific kit. It may provide correctly spaced railings, replacement radars, lattice masts, ladders, boat davits, crane assemblies, or finer anti-aircraft weapons. It should improve what can actually be seen on the completed model without creating unnecessary compatibility work.
For most builders, photoetched brass is the first meaningful upgrade. Kit-supplied railings and inclined ladders are usually overscale because plastic needs thickness to mold reliably. Photoetch brings those features closer to scale, particularly in 1/350 and 1/700. It also makes perforated platforms, catwalk supports, antenna arrays, and open-frame structures possible in a way injected plastic rarely can.
However, photoetch is only one part of the choice. Resin replacements often give a better result for weapons, directors, ships' boats, ventilators, and smaller fittings with three-dimensional form. Turned metal barrels are useful where long gun tubes remain highly visible. Laser-cut wooden decks add convincing plank detail and can save substantial masking time, but they need clean preparation and accurate placement.
The right set depends on what the original kit already does well. A newer-tool kit may need only railings, radars, and a few weapon upgrades. An older kit may benefit from a comprehensive package that addresses the superstructure, masts, boats, armament, and deck equipment.
Start With Exact Kit Compatibility
Do not buy by ship name alone. A set marked for USS Missouri, Bismarck, HMS Dreadnought, or another well-known subject may have been designed around one manufacturer's tooling. Different kits can vary in deck layout, bulkhead positions, platform dimensions, gun mounts, and bridge shape. A photoetch fret intended for one release can require considerable cutting and adaptation on another.
Check the manufacturer, kit number, scale, and stated version of the vessel before ordering. This matters especially for ships that changed throughout their service life. Radar fits, light anti-aircraft batteries, bridge structures, camouflage patterns, and aircraft arrangements could differ significantly between commissioning, refit, and late-war configuration.
If you are building a particular date, treat that date as part of the specification. A generic set may improve the model, but a dedicated set tied to a defined fit is usually the safer option for an accuracy-focused project.
Scale Changes the Best Purchase
In 1/700, fine railings, cranes, radars, inclined ladders, and replacement gun barrels make an immediate visual difference. Because the finished model is compact, large resin corrections can sometimes be less noticeable than clean, consistent photoetch work. A basic detail set plus suitable railings is often a sensible starting point.
In 1/350, the viewer can see much more. Open bridge windows, ready-service lockers, cable reels, boat interiors, weapon shields, watertight doors, and funnel details become worthwhile. This scale rewards more extensive detailing, though it also makes poor fit and heavy glue marks easier to spot.
At larger scales, research and construction time become as important as the parts budget. A full upgrade package can transform the model, but it can also extend the project considerably. Decide early whether you want a display-quality centerpiece or a well-finished build that reaches the display case within a reasonable time.
Choose Between Dedicated and General Ship Detail Sets
Dedicated sets are designed for a single kit or a tightly related family of kits. They normally include parts shaped for specific platforms, bridge levels, cranes, mast arrangements, and weapon positions. Their advantage is efficiency. Less measuring, less improvisation, and a better chance that the finished assembly matches the intended ship.
General sets are useful when a dedicated option is unavailable, when correcting only selected areas, or when building multiple ships in the same scale. Common examples include generic railings, inclined ladders, vertical ladders, anchor chain, portholes, life rings, rigging materials, and naval crew. They also give experienced builders a practical parts reserve for replacing lost pieces or adding small details absent from the kit.
A combined approach is often best. Use a dedicated photoetch set for the major structures, then add a general railing set, brass barrels, or resin weapons where the dedicated package is limited. This avoids paying for duplicated parts while allowing you to focus money where it shows.
Prioritize the Details That Read at a Distance
Not every component deserves equal effort. On most ship models, railings, ladders, radars, cranes, masts, and main or secondary armament define the model's character before tiny deck fittings do. If the budget is limited, start there.
Railings deserve particular attention. They run along long deck edges and immediately reveal whether a model is built to scale. Select the correct style and height for the subject, and confirm whether the set supplies pre-cut lengths, continuous runs, or both. Pre-cut sections can speed a dedicated project, while continuous railing gives flexibility around curves and modified areas.
Gun barrels are another high-value improvement. Plastic barrels can have seams, soft muzzles, or slight bends. Turned metal replacements provide crisp openings and straight alignment, but they must match the correct weapon type and mount. Installing a beautifully machined barrel that belongs to a different production variant is still an error.
Radar arrays and catwalks add delicacy to upperworks. They are highly visible, especially after careful painting, but they demand good folding technique. If you are new to photoetch, begin with simpler railings and ladders before committing to a complex lattice mast or multi-part crane.
Photoetch, Resin, Wood Decks, and Metal Barrels
Photoetch requires sharp cutters, a smooth hard surface, fine tweezers, and a suitable folding tool or flat blades. Use a small amount of adhesive. Excess cyanoacrylate quickly fills open spaces and ruins the scale effect that photoetch provides. Prime brass before painting, and test-fit assemblies while access is still easy.
Resin parts usually need careful removal from casting blocks and a wash to remove mold-release residue. They can bring much better definition than plastic, particularly for small weapons and boats, but they are not indestructible. Thin resin pieces need gentle handling and a straight, level mounting surface.
Wooden decks are attractive because they provide subtle plank lines and a consistent finish across large deck areas. Their trade-off is commitment. Once placed, repositioning can be difficult, and deck-mounted parts may need their locating holes opened beforehand. Compare the deck to the kit parts before painting begins, not after the superstructure is attached.
Turned metal barrels are usually straightforward, but alignment is critical. Install them with a simple jig, ruler, or visual reference from several angles. A ship with uneven main battery elevation will draw attention for the wrong reason.
Plan the Upgrade Before Cutting Plastic
The best time to buy and inspect ship detail sets is before major assembly. Study the instructions, compare the aftermarket instructions with the kit sequence, and mark the steps where plastic parts must be removed or replaced. Some photoetched platforms need to be fitted before adjacent bulkheads close off access. Some wooden decks require parts to remain separate for painting.
It also helps to separate upgrades into three groups: essential corrections, visible refinements, and optional extras. Essential corrections address inaccurate or missing kit features. Visible refinements include railings and weapons that improve the finished appearance. Optional extras are details you enjoy adding but can leave out without compromising the model.
This approach controls both cost and momentum. A fully upgraded ship can be satisfying, but a project stalled under hundreds of unused parts is not. MODELIMEX builders can benefit from selecting by exact scale and kit subject first, then adding compatible accessories only where the model calls for them.
The most rewarding ship upgrade is the one that supports your intended finish. Choose parts that fit the kit, match the vessel's period, and suit your handling skills. A cleanly installed set of railings, accurate weapons, and well-planned rigging will usually make a stronger impression than every available accessory forced onto the deck.
(This article was created by AI)