
Share:
How to Prevent Decal Silvering on Scale Models (30.09.26)
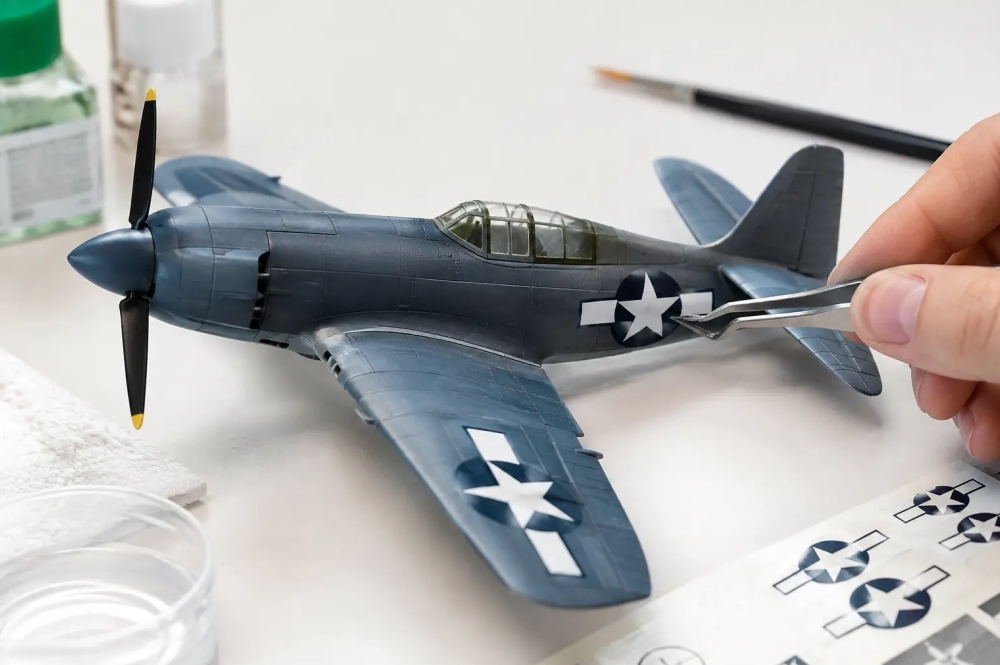
A flawless national marking can look wrong the moment its clear carrier film turns pale gray against the paint. Learning how to prevent decal silvering is less about finding one miracle liquid and more about controlling the surface, the decal, and the air trapped between them. Get those three points right, and even large 1/32 aircraft insignia or fine 1/72 stencil decals can settle in with a convincing painted-on appearance.
Silvering is most visible under a flat finish, on dark camouflage, and around large areas of clear film. It can affect fresh aftermarket decals and older kit decals alike. The good news is that it is usually preventable before the decal ever touches the model.
What Decal Silvering Actually Is
Decal silvering is not normally a fault in the printed ink. It is light reflecting from tiny air pockets trapped under the transparent carrier film. A painted surface may look smooth to the eye while still having enough microscopic texture to hold air. Matte and satin paints are particularly prone to this because their finish is deliberately uneven at a very small scale.
When clear film bridges those tiny peaks rather than fully contacting the paint, the trapped air catches the light and produces the familiar frosted or silvery look. A final flat coat can disguise very mild silvering, but it rarely corrects severe cases. Prevention is far more reliable than trying to hide the problem after weathering and sealing are complete.
How to Prevent Decal Silvering Before Application
The dependable starting point is a clean, glossy surface. Apply decals over a properly cured gloss clear coat, or over naturally glossy paint where the finish is truly smooth. For most military subjects, this means finishing camouflage and detail painting first, allowing the paint to cure, then applying a thin, even gloss layer before decals.
A gloss coat does not need to create a thick, wet-looking shell. Its purpose is to level the texture enough that the carrier film can make complete contact. Heavy clear coats can obscure delicate rivets, recessed detail, and subtle paint variation, especially in smaller scales. Use the lightest application that produces a continuous smooth surface.
Before decaling, remove dust, sanding residue, fingerprints, and dried wash splatter. Handle the model with clean hands and inspect it under a strong angled light. A speck of dust under a broad fuselage marking can create a visible raised spot and leave a channel for air or water.
If you are working on a model with a polished natural-metal finish, use extra care. Silvering is especially obvious over metallic paint, while strong decal solutions can mark some metallic finishes. Test the complete paint, gloss, decal, and solution combination on a spare painted part whenever possible.
Check the Decal Before It Goes in Water
Not all decals behave the same way. Modern thin aftermarket sheets may need only a mild setting solution, while older, thicker kit decals often benefit from a stronger softener. Very old decals can crack or separate when soaked. In that situation, protecting the sheet with a compatible decal film before cutting out markings may be sensible, but the added film must then be trimmed close to the printed design.
Cut each decal as closely as practical. Removing excess carrier film is one of the simplest ways to reduce the area that can silver. This matters most with individual letters, codes, serials, and large clear-backed unit markings. Leave enough margin to avoid cutting into the printed color, particularly around fragile thin lines.
Use clean lukewarm water. Water that is too hot can distort delicate decals or make adhesive behavior unpredictable. Let the decal loosen on its backing paper rather than forcing it off. If it slides easily but remains supported by the paper, you have much better control during placement.
Use Water and Setting Solution Correctly
Place a small amount of clean water or a mild decal setting solution on the model before sliding the decal into position. The wet layer allows adjustment and helps prevent the decal from grabbing the surface before it is aligned. Do not flood every area of the model. Excess water can carry debris, dilute the adhesive too much, and make it difficult to judge whether the decal has fully settled.
Once positioned, use a soft, damp brush to guide the decal rather than dragging it with a dry tool. Work from the center toward the edges with a clean cotton swab, soft tissue, or silicone-tipped decal tool. The aim is to wick away water and push out air without shifting the marking or tearing it.
A setting solution helps the decal conform and improves contact with the surface. Apply it sparingly after the decal is positioned. Let it work undisturbed. This is the stage where many builders damage a decal by trying to smooth out wrinkles too soon. As the solution softens the film, the decal may wrinkle or look uneven. Do not touch it until it has dried and tightened back down.
Stronger softening solutions are useful over raised rivets, recessed panel lines, weld seams, louvered panels, and compound curves. They are not automatically better. An aggressive solution can distort thin decals, attack delicate printed inks, or cause a marking to fold onto itself. Start mild, then use a stronger product only when the decal needs more help conforming to the detail.
Compound Curves Need Patience
A decal that must wrap around a drop tank, missile, turret, radome, or curved vehicle fender may need several applications of solution. Allow each application to dry fully before deciding whether another is required. A light poke with a new, sharp blade can release trapped air over a recessed line, but do this only after the decal has settled and only where the cut will be hidden by the detail or weathering.
For very complex shapes, consider whether a paint mask is the better choice. National insignia, invasion stripes, vehicle markings, and large simple codes can sometimes be painted more convincingly than they can be decaled. Decals remain the practical choice for intricate artwork, tiny stencils, multicolor badges, and markings that would be difficult to mask accurately.
Seal Decals at the Right Time
Leave decals to dry thoroughly before applying any clear coat. Overnight is a safe minimum in normal conditions, and longer may be sensible with large decals or humid workspaces. If moisture remains under the film, sealing too early can trap it and create cloudy areas.
Inspect the model under side lighting before the next stage. If the decal edges are fully down and the carrier film is clear, apply a thin protective gloss or satin coat to seal the markings. This layer protects decals during panel-line washes, filtering, chipping, and other weathering steps. After weathering, use the final finish appropriate to the subject: flat for most operational armor and military aircraft, satin for many vehicles and ships, or gloss for polished civilian and display finishes.
The final clear coat should match the entire model, not just the decals. Spraying a heavy flat coat solely to hide carrier film can dull metallic paint, reduce the depth of transparent parts, and bury surface texture. If silvering remains visible before the final coat, deal with it first.
Fixing Silvering That Has Already Appeared
Mild silvering can often be rescued. First, confirm that the decal is fully dry. Then use a very sharp needle or blade to make a few tiny punctures in the affected clear film. Apply a small amount of setting solution so it can wick into the air pockets, then gently press the area down after the decal has softened. The punctures should be minimal and placed where they will not damage visible artwork.
If the decal has silvered across a broad area, repeating this process in small sections may work. Do not soak the model repeatedly with strong solution. At some point, the risk of damaged print, staining, or a wrinkled decal exceeds the likely improvement.
When a badly silvered marking is prominent, replacement is often the cleanest solution. Remove the damaged decal carefully, restore the gloss surface if needed, and apply a new marking with better preparation. For rare subjects or older sheets, it is worth testing a spare marking on a painted sample before committing to the finished model.
A Practical Decaling Routine
For consistent results, keep the sequence simple: paint and cure the model, apply a smooth gloss coat, clean the surface, trim decals closely, position them over a small wet area, remove water and air from the center outward, then use setting solution in controlled amounts. Seal only after the decals are completely dry.
The exact products can vary, and the best combination depends on paint type, decal thickness, and surface detail. What does not change is the principle: decals need a smooth surface and full contact. Treat the glossy preparation stage as part of the decal job, not an optional extra, and the clear film will stay where it belongs - nearly invisible on the finished model.
(This article was created by AI)