
Share:
Injection Molded Versus Resin Kits Compared (04.09.26)
A 1/48 cockpit with fine cast wiring, a rare 1/72 prototype, or a large 1/350 correction set can make resin look like the obvious choice. Yet the best result does not automatically come from the material with the sharpest detail. The decision between injection molded versus resin kits affects every stage of a build: preparation, fit, adhesives, painting, durability, and how much time you spend solving problems before the first coat of primer.
For most mainstream subjects, injection-molded plastic remains the practical foundation. Resin earns its place where limited production, unusual subjects, fine surface detail, or substantial corrections matter more than quick assembly. Neither is universally better. The right choice depends on what you want from the project and how much hands-on work you are prepared to do.
Injection Molded Versus Resin Kits: The Basic Difference
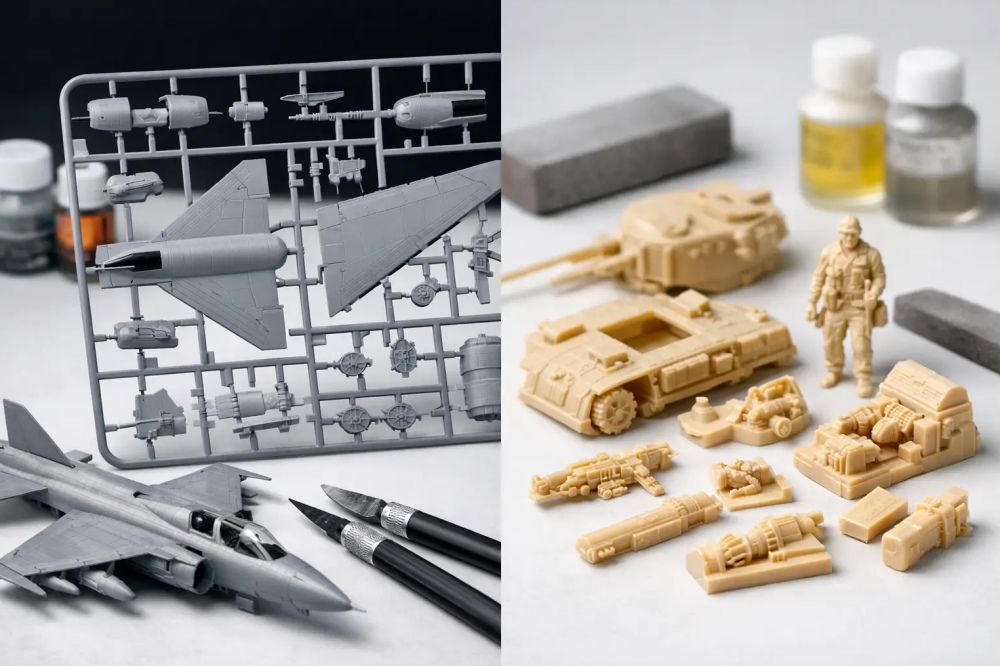
Injection-molded kits are produced by forcing molten polystyrene into precision metal molds. The high initial tooling cost only makes sense when a manufacturer expects to sell a substantial number of kits. That is why this format dominates popular aircraft, armor, ships, cars, and figures in scales such as 1/72, 1/48, 1/32, and 1/350.
Resin parts are cast in smaller molds, usually silicone molds, using liquid polyurethane resin. Tooling costs are much lower, which gives specialist manufacturers the freedom to produce niche subjects, short-run variants, replacement parts, and conversion sets that would be difficult to justify in mainstream plastic production.
That production difference explains most of the practical trade-offs. Plastic kits generally offer more consistent engineering, lower prices, and easier assembly. Resin can reproduce very fine detail and supports specialized releases, but it asks more from the modeler.
What Injection-Molded Kits Do Best
A well-engineered injection-molded kit is usually the most efficient route to a clean, accurate model. Plastic parts are light, predictable, and designed around conventional assembly. Positive locating pins, tabs, bulkheads, and multi-part subassemblies help establish alignment before glue is applied.
Polystyrene cement is one of the major advantages. It melts mating surfaces slightly and creates a welded joint, giving the modeler time to adjust alignment. For long fuselage seams, wing roots, hull sections, and major armor components, that working time is useful. The resulting joint can also be sanded and rescribed without the abrupt change in material hardness found when resin and plastic meet.
Modern tooling can provide excellent recessed panel lines, surface textures, thin edges, and multi-part detail. For a widely available subject, a current plastic kit may include detail that would once have required substantial aftermarket work. It is also generally more forgiving for an intermediate builder who wants to focus on finishing, markings, and weathering rather than correcting warped parts or removing casting blocks.
Plastic is not free of limitations. Mold design can create unavoidable compromises, particularly around deep undercuts, one-piece cockpit structures, open intakes, or highly detailed wheel wells. Some parts may be thicker than scale appearance suggests, and older kits can show soft detail, heavy panel lines, or simplified interiors. Those are often the areas where resin upgrades remain worthwhile.
Where Resin Kits Earn Their Place
Resin excels at low-volume subjects and complex shapes. A manufacturer can produce an obscure aircraft version, a specific armored vehicle conversion, a detailed engine bay, or a ship fitting without committing to expensive steel tooling. For builders interested in particular operators, prototype aircraft, rare versions, or precise corrections, this is a major benefit.
The casting process can capture remarkably crisp detail. Seat cushions, cockpit sidewalls, instrument panels, fabric texture, weld beads, stowage, and small fittings often look more convincing in resin than in comparable kit plastic. Resin also permits shapes that would be difficult to release from a conventional injection mold without splitting them into several parts.
A full resin kit can therefore be the only viable path to a subject that has never received a mainstream release. It may also represent the most accurate available starting point if its producer has worked from strong references. But rarity and detail should not be confused with automatic accuracy. Short-run products vary greatly in research quality, casting quality, and instructions. Check the specific manufacturer and release rather than assuming resin guarantees a better model.
Preparation Is the Real Dividing Line
The biggest practical difference is not the material itself. It is the preparation required before assembly.
Injection-molded parts normally need removal from sprues, cleanup of attachment points, dry-fitting, and occasional seam work. Resin parts often need all of that plus careful removal of casting blocks, cleanup of pour stubs, correction of slight warping, and a thorough wash to remove mold-release residue. If release agent remains on the surface, paint and glue may fail when it matters most.
Wash resin components in warm water with a mild degreasing detergent, then allow them to dry completely. Avoid overly aggressive heat or solvents unless the manufacturer specifically recommends them. Thin or warped resin pieces can sometimes be straightened with controlled warm water, but the part should be supported and handled carefully.
Removing casting blocks requires planning. A razor saw, fine saw blade, sanding sticks, and a flat sanding surface are standard tools. Do not simply cut close to a delicate part and hope for the best. Identify where the finished edge belongs, leave a small margin, then sand gradually to the final line. This approach is slower, but it prevents losing a thin trailing edge, delicate strut, or cockpit wall.
Resin dust deserves serious attention. Sand or saw resin with suitable respiratory protection and good ventilation, preferably using wet sanding where practical to keep dust down. Clean the work area afterward. This is routine workshop discipline, not an optional extra.
Fit, Adhesives, and Structural Strength
Plastic kits usually have an advantage in predictable fit, especially from manufacturers with established tooling standards. Resin kits can fit very well, but they are more dependent on precise cleanup and dry-fitting. A casting block left slightly too thick can throw off an entire fuselage or hull joint.
Resin does not respond to liquid plastic cement. Use cyanoacrylate adhesive or two-part epoxy. Cyanoacrylate is fast and convenient for small components, but it gives little adjustment time and can create a brittle joint if used carelessly. Epoxy is slower, fills gaps better, and is often the better option for major assemblies, heavy parts, or areas that need time to be aligned accurately.
For large resin components, adding brass wire pins or metal rod can make an enormous difference. Pinning is especially useful for landing gear, wing joins, tailplanes, hull structures, and heavy conversion sections. Mark both mating surfaces carefully, drill shallow matching holes, test the fit, and only then commit to adhesive.
When combining resin aftermarket with an injection-molded kit, expect a little fitting work. The resin part may be more accurate than the kit opening it replaces, which means the plastic surrounding it must be thinned, cut, or reshaped. The goal is a convincing finished assembly, not forcing parts together because the instructions appear to show a drop-in replacement.
Cost, Availability, and Project Value
Injection-molded kits are typically less expensive for a complete model, particularly for common subjects. They are also easier to replace if a part is damaged or a project goes wrong. Resin full kits cost more because production runs are smaller and casting is labor-intensive. Limited availability can also matter: a desired release may disappear for long periods between production batches.
A resin conversion or detail set can be a better value than a full resin kit when a sound plastic base kit already exists. Replacing only the areas that need improvement - a cockpit, wheels, exhausts, radar nose, armament, or a correction section - keeps the project manageable while preserving the straightforward assembly of the plastic kit.
Before buying, confirm the intended base kit and scale. A set designed for one tooling may not fit another release of the same subject, even when both are labeled identically. This is particularly relevant for cockpits, wheel wells, fuselage plugs, and exterior correction sets where millimeters matter.
Choosing the Right Material for Your Build
Choose injection molded plastic when you want dependable engineering, a broader choice of mainstream subjects, easier assembly, and a build centered on finishing quality. It is also the sensible choice when you are testing a new subject area, returning to the hobby, or working to a deadline.
Choose a full resin kit when the subject is unavailable in plastic, when the kit offers a particular version you want to model, or when its detail and shape accuracy justify the added work. Choose resin aftermarket when it solves a specific weakness in an otherwise good plastic kit.
The strongest projects often use both materials with purpose. Start with the plastic kit that gives you the best overall shape and engineering, then add resin only where it visibly improves the finished model. Buy the kit that supports the model you actually want to place on the shelf, and let the material determine your workflow, not your ambition.
(This article was created by AI)